How to Turn Off Fast Startup in Windows 10 and 11
Fast Startup is a feature in Windows 10 and 11 designed to help your computer boot up more quickly by combining elements of shutdown and hibernation. When enabled, Fast Startup keeps certain system files in a hibernated state, allowing your PC to start up more rapidly the next time you power it on. While this sounds like a great way to speed up your PC, it can come with some drawbacks. Here’s why you might want to turn off Fast Startup and how to do it.
Why Turn Off Fast Startup?
Though Fast Startup sounds convenient, especially if you want to get back to work or play quickly, it doesn’t allow your computer to completely shut down. Instead, it places your system into a hybrid state, which can lead to some issues:
- Incomplete Shut Down: When Fast Startup is enabled, the system does not fully power off. This means that a complete reset of system resources doesn’t occur, which can cause lingering performance issues like high memory usage or lag.
- Accessing BIOS/UEFI: Since your PC never fully shuts down, it may prevent you from accessing BIOS or UEFI settings during startup. This can be frustrating when you need to change hardware configurations or adjust boot order.
- Hardware Compatibility: Some hardware components, like drivers or peripherals, may not work correctly after a Fast Startup because they aren’t fully reset.
- Dual-Boot Systems: If you have multiple operating systems installed on your machine, Fast Startup can interfere with the other OS, causing boot issues or potential data loss.
To prevent these potential issues, it’s often a good idea to disable Fast Startup, ensuring that when you shut down your computer, it actually powers off fully. This way, you get a clean, fresh boot each time you power on your machine.
How to Turn Off Fast Startup in Windows 10 and 11
Turning off Fast Startup is a straightforward process. Follow these simple steps:
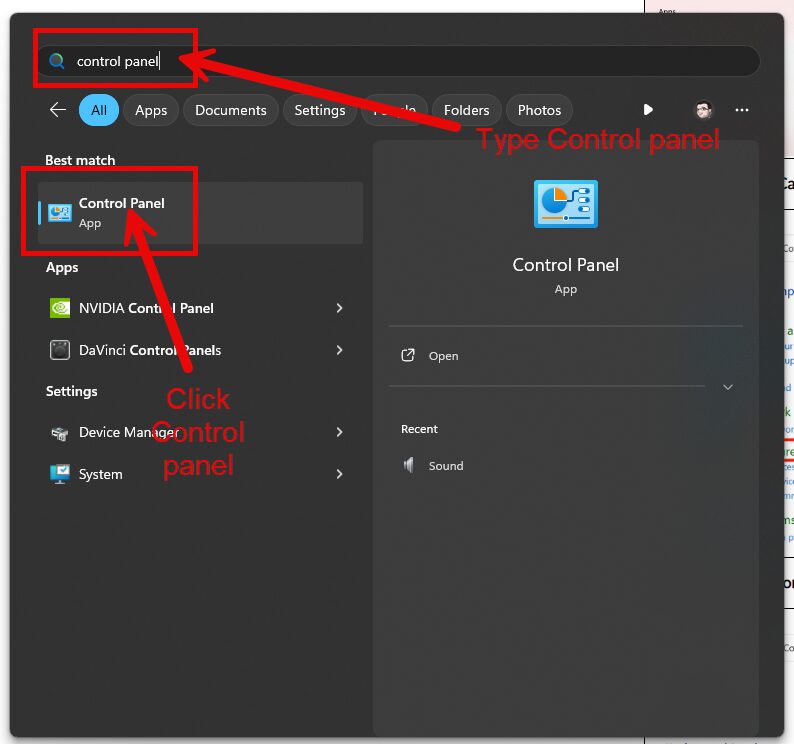
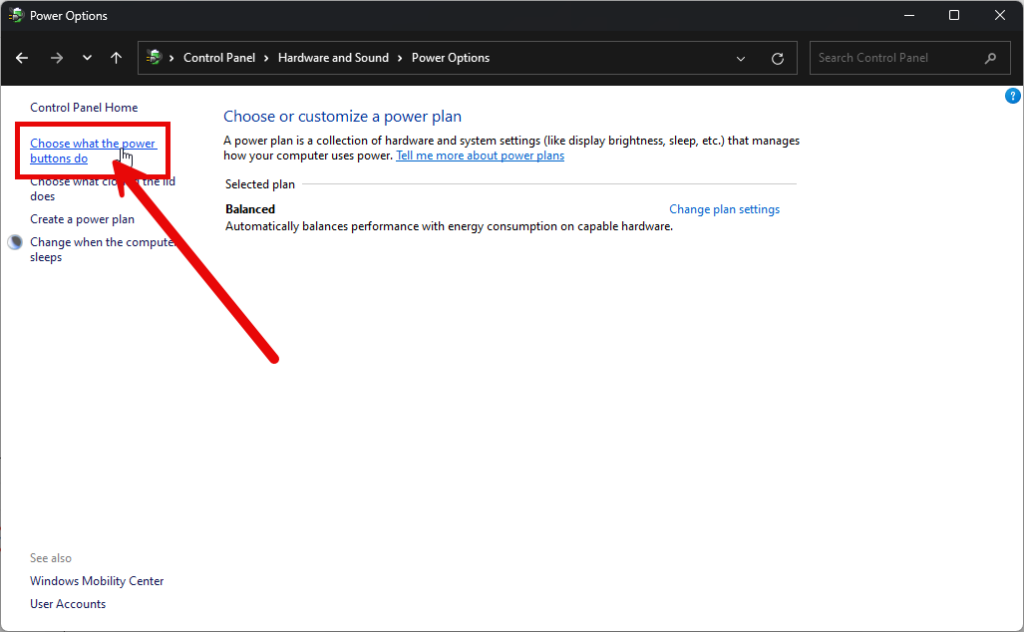
1. Open the Power Options
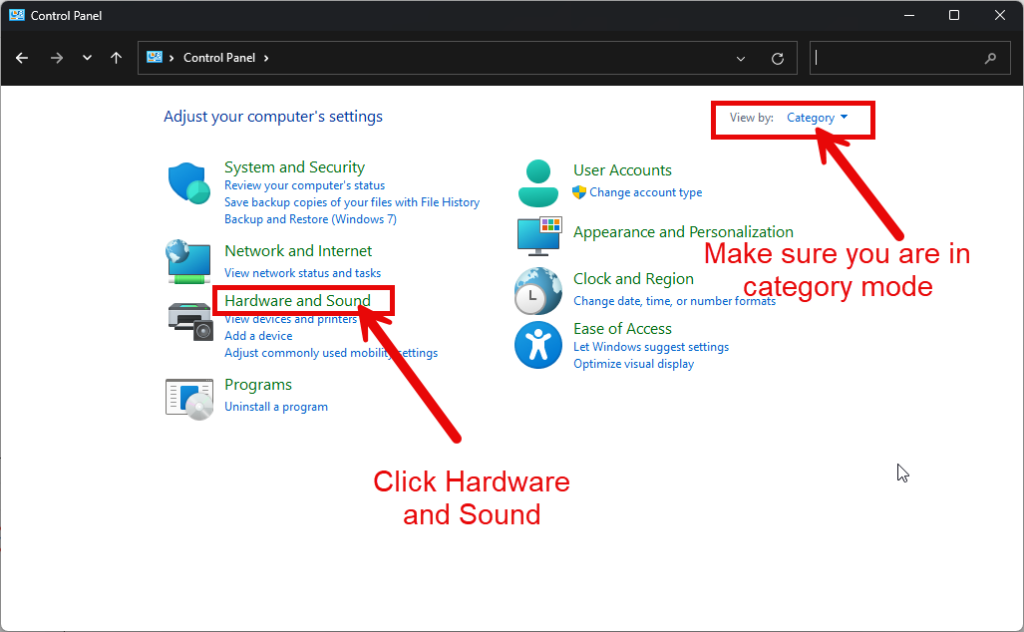
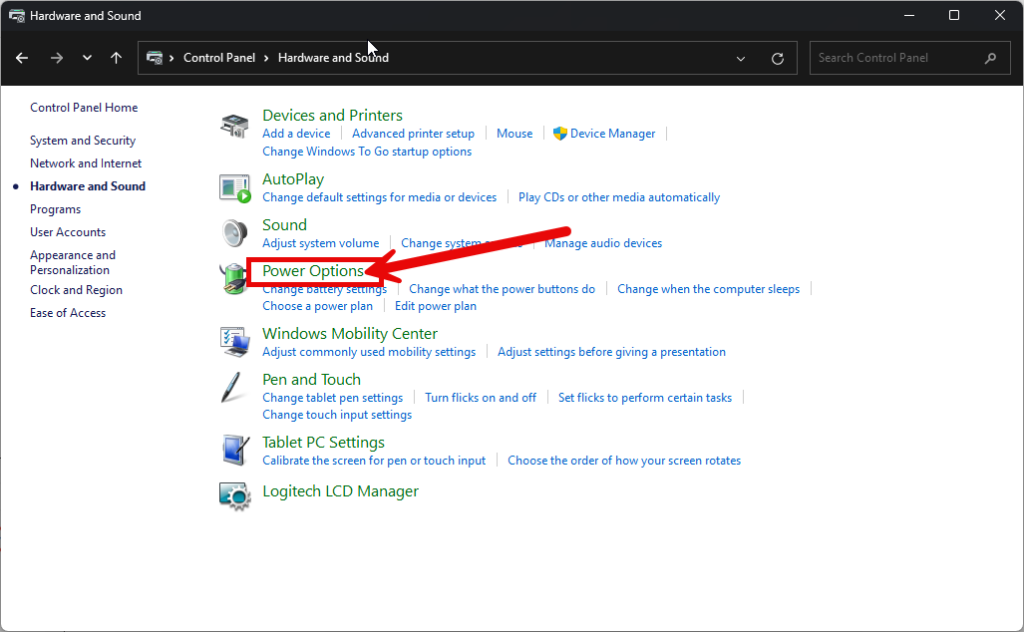
- Open the Start Menu, type “Control Panel” and open it. Once in Control Panel, go to Hardware and Sound and then select Power Options.
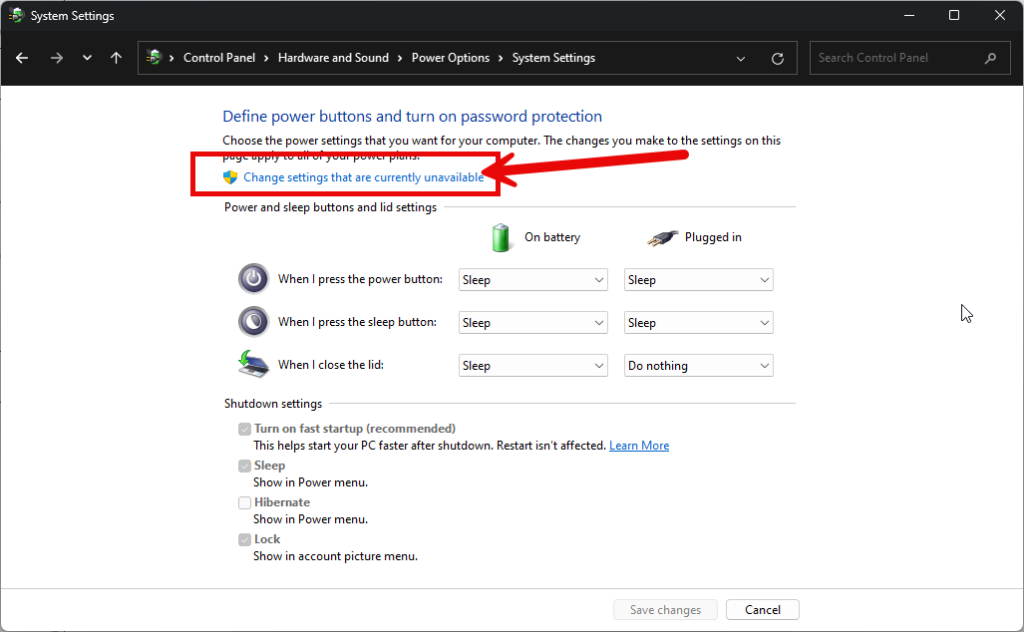
2. Access System Settings
Once you’re in the Power Options window:
- On the left-hand side, click Choose what the power buttons do.
- Click on Change settings that are currently unavailable at the top. This allows you to modify the shutdown settings that are usually greyed out.
3. Disable Fast Startup
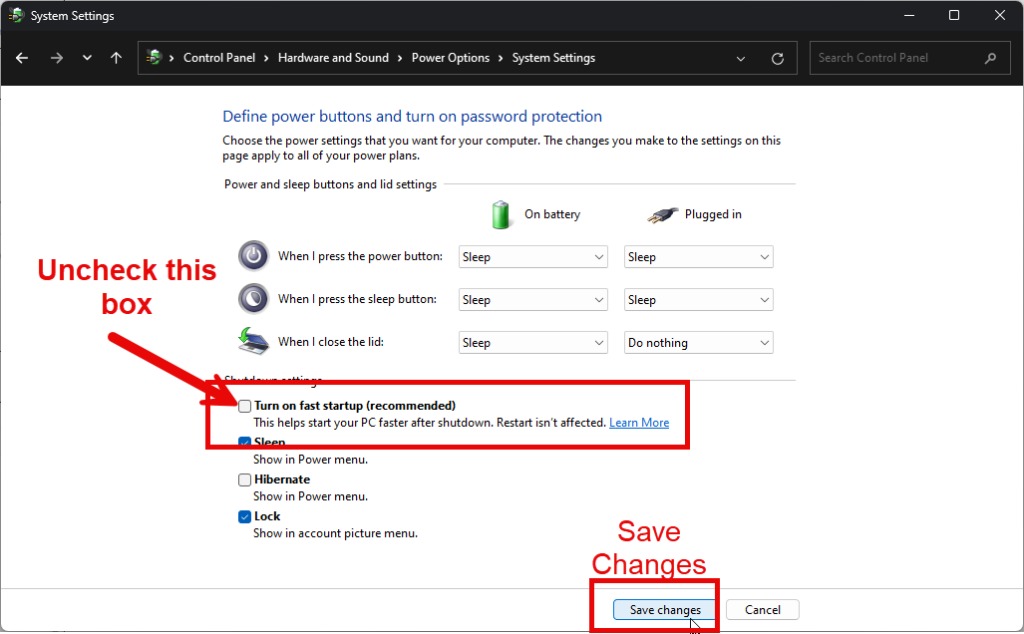
In the Shutdown settings section, you will see an option called Turn on fast startup (recommended). To disable it:
- Uncheck the box next to this option.
4. Save Your Changes
- After unchecking the Fast Startup option, click Save changes at the bottom of the window.
That’s it! Fast Startup is now disabled. The next time you shut down your PC, it will fully power off, giving you a fresh start on the next boot.
Additional Notes:
- Restarting Your PC: Keep in mind that restarting your PC is not affected by Fast Startup. Restarting always performs a full system reboot, regardless of whether Fast Startup is enabled or not.
- Impact on Boot Time: Without Fast Startup, boot times may be a bit slower, especially if your machine relies on an older hard drive (HDD). However, if you use a solid-state drive (SSD), you may not notice a significant difference in startup speed.
Conclusion
Fast Startup in Windows 10 and 11 is a handy feature for faster boot times, but it comes with its own set of drawbacks, particularly when it comes to system stability, hardware compatibility, and access to BIOS/UEFI settings. By turning it off, you ensure that your PC shuts down completely, potentially reducing memory issues and providing a cleaner boot each time. If you find that your computer is running slower or you need to access your BIOS settings, disabling Fast Startup is a simple and effective fix.